Get Ready to Ride: Transform into Ghost Rider with This Step-by-Step Tutorial
An easy-to-follow makeup tutorial that will bring out your inner Hellfire!
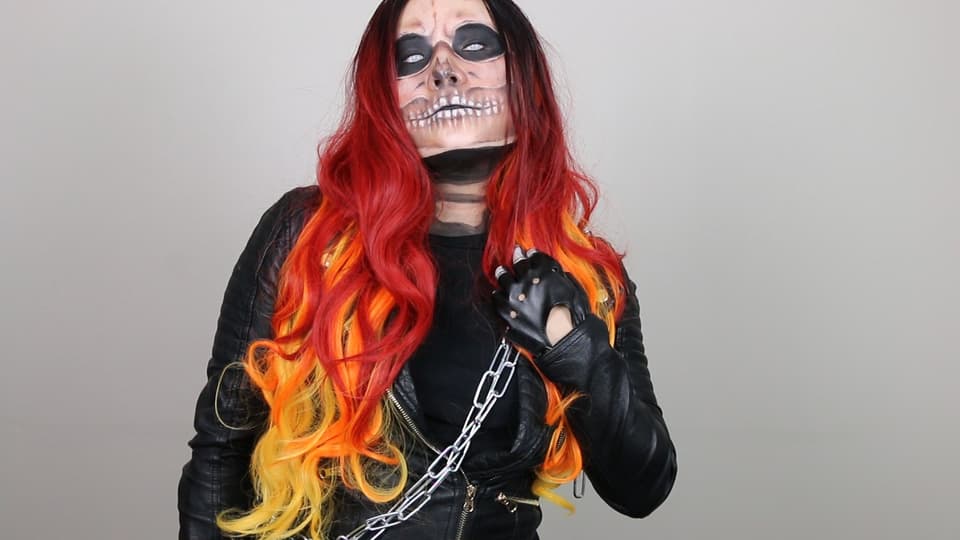
Alright, Ghost Rider fans! Journey with me to Hell and back as we transform ourselves into Ghost Rider for this Halloween makeup tutorial. This is a great, multi-purpose tutorial because it is basically a human skull, so the possibilities for you to get creative are at your fingertips!
Here's what you'll need:
Tools:
Eyeshadow applicator or brush
Pointed brush
Flat eyeshadow brush
Super-fine-tipped brush
Long, flat synthetic brush
Makeup:
Brown or white eyeliner or lipliner (or both)
Black eyeliner
Light, medium, and deep brown eyeshadows
Brownish-red eyeshadow
Black eyeshadow
Water-activated body paint (black and white)
Accessories:
Contact lenses
Fire wig
Leather jacket
A Spirit of Vengeance
Here's how to do it!
1. Use either a brown or white eyeliner or lipliner pencil (I used both!) to trace out the skull anatomy on your face (the eye sockets, cheek bones, jaw bones, etc.). I use brown or white because if you need to erase or alter your outline, it is easy to smudge the lines out with your fingertips if you make a mistake. Don’t worry if it takes you a couple of tries to get it right! Everyone’s face is structured differently.
HOT TIP: Feel around with your fingers for the indentations on your face to see where the dips and curves are.
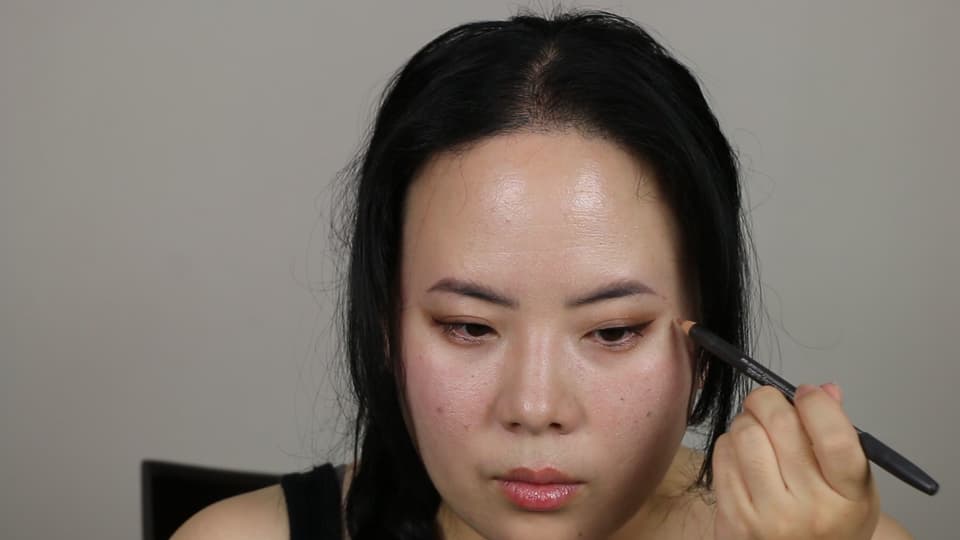
2. Once you are happy with the skull anatomy you have traced, take a light brown eyeshadow and shade in the natural contours on your face. This will help build shadows and highlights.
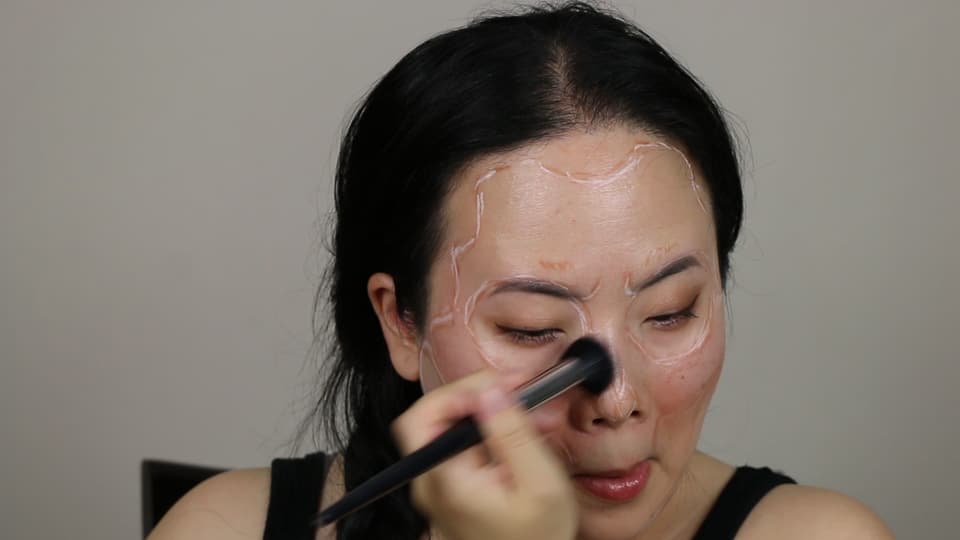
3. Next, pick up some water-activated body paint and a pointed brush. Use a small amount of water to wet the brush and paint the outer perimeter hollows of your face black. This will create the illusion that there is negative space and make the bone structure pop. You will want to set the paint with some black eyeshadow to even out and set the paint.
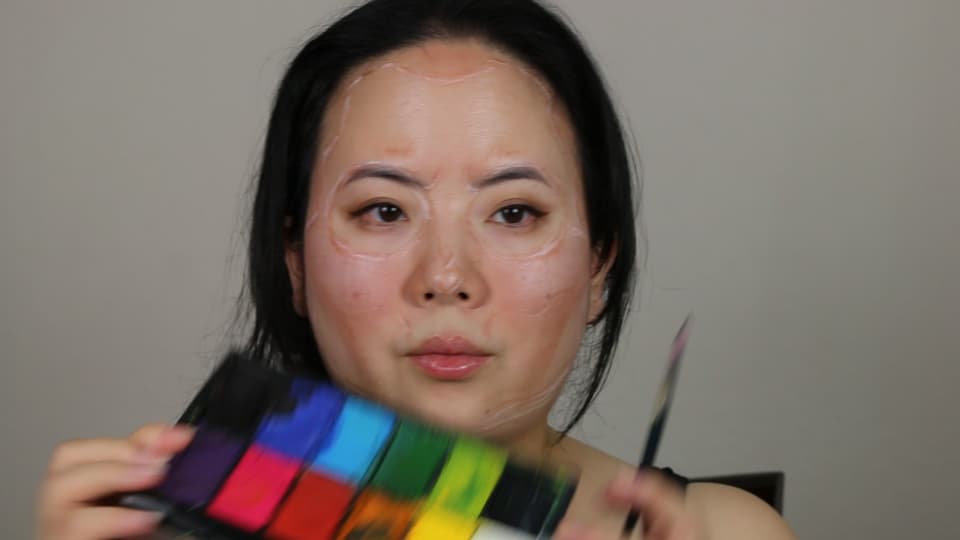
4. Start shading the bone lines that we traced earlier. You will want to use three different shades of shadow. I chose brown/brownish red colors to create a more organic and gritty mood. Start with the lightest brown shade and a flat eyeshadow brush, and start to shade in the lowlights, frown lines, nose hollow, etc. on the bone. You will want to create a gradient effect so spend some time blending it out.
HOT TIP: Pull reference photos from actual skulls for anatomy reference!
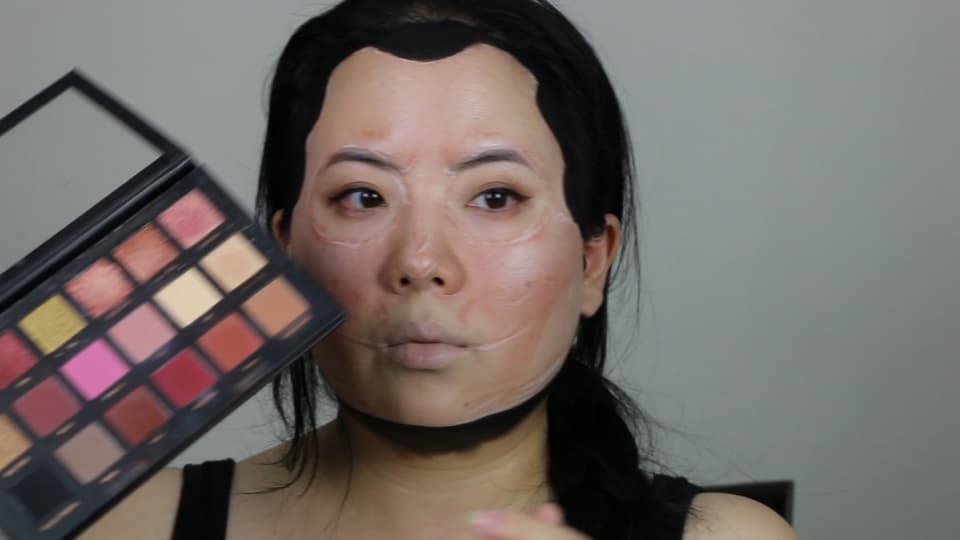
5. It might help you to outline the bone structure with a super-fine-tipped brush and the black water-based paint. You can then blend out any excess brown or white liner away. I also took this time to create some of the cracks in the bone that may appear along the forehead, around the eye sockets, and the temples.
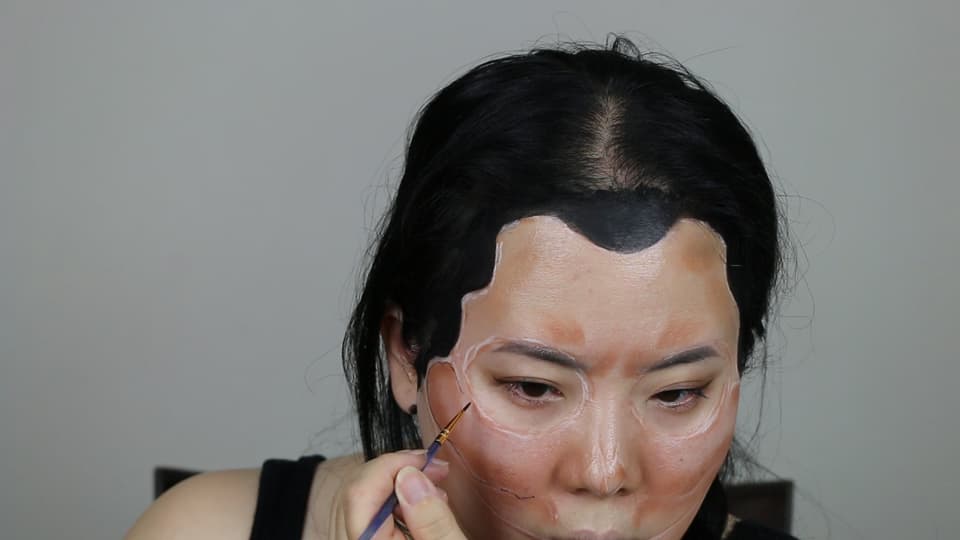
6. To really amp up the ghoulishness and to really bring the skull to “life,” we can now start to paint the teeth! Take a long, flat, synthetic brush (I like to use paint brushes) and dip it into the water-activated white body paint. Start with the flat edge of the brush, and along the mouth line start to paint upwards or downwards, tapering the line as you go.
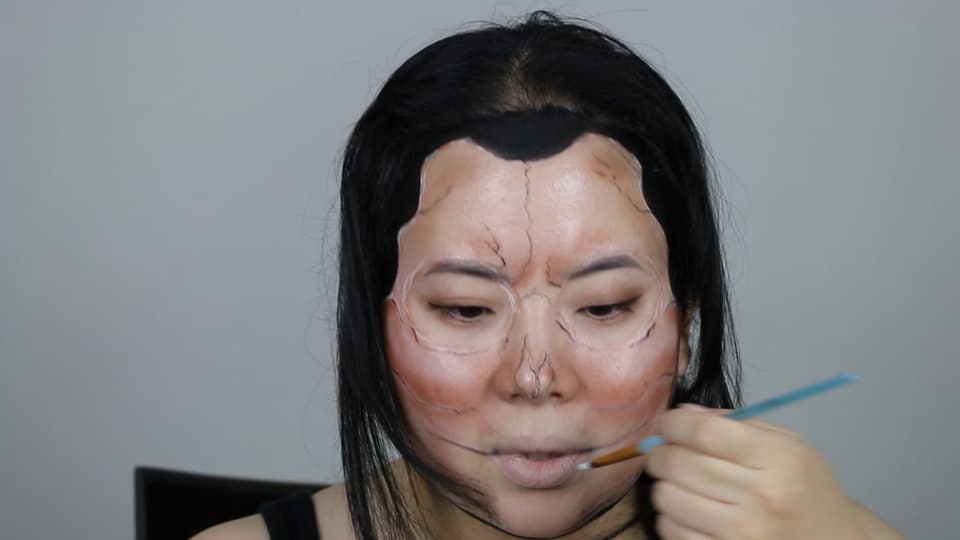
7. Now you can start to deepen your shading on the bone with your medium and deep brown shadows. You want the deepest color to be closest to the black lines and fading to the lightest towards the center.
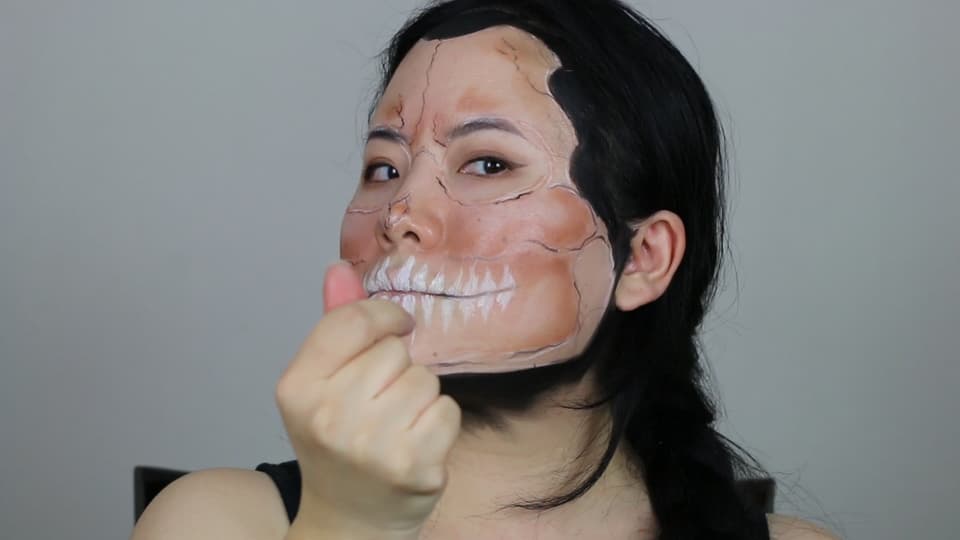
8. To really make the skull go “POP,” take some white eyeshadow and blend it onto the high points of the “bone.”
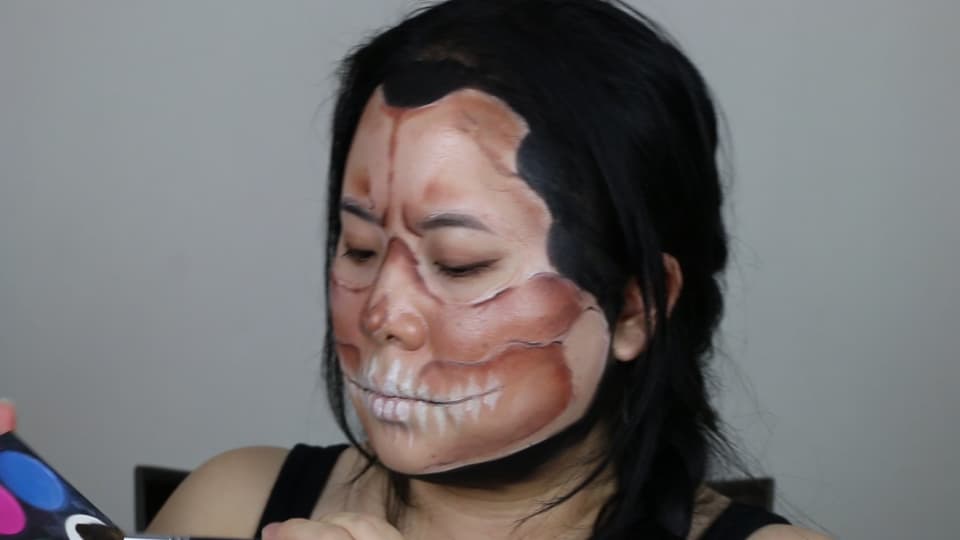
9. Now comes my favorite part – bringing the teeth to life! Take the same three brown shadows, and using a small, flat, eyeshadow brush, start to shade in between the white teeth that you painted earlier. Start out skinnier, and fan outwards in a “Y” shape going from lightest to darkest. The darkest shadow should be closest to the mouth line. You can also use the shadow to round out any shapes of the teeth.
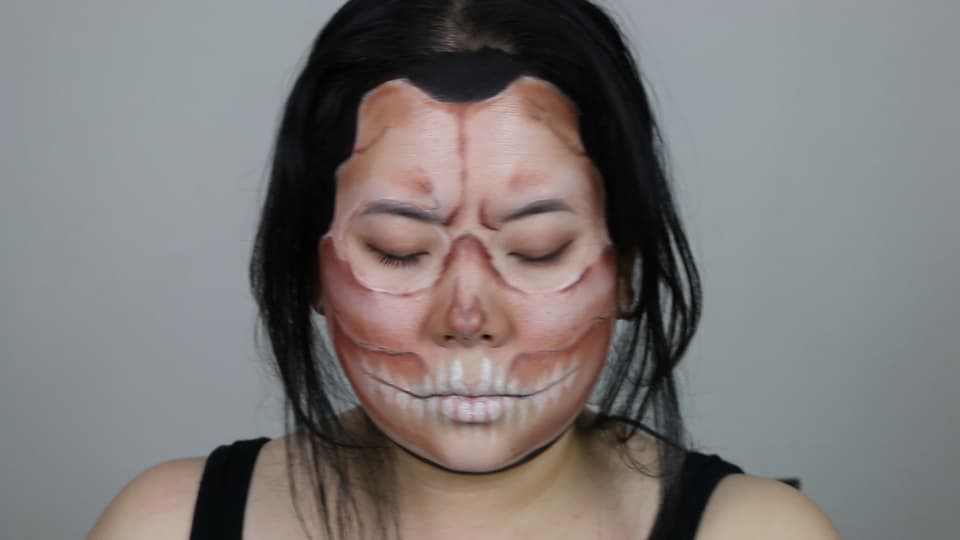
10. To really get that sinister Ghost Rider look, black out the entire socket of the eye with the black water paint and set with a black eyeshadow. For precision, I took a black eyeliner pencil and filled in the upper and lower water line so no skin tone was showing.
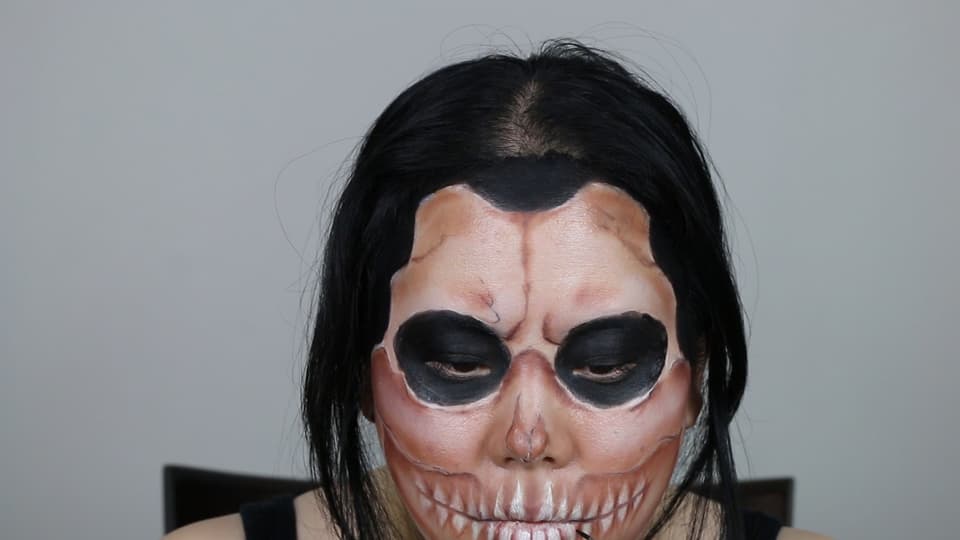
11. Add the black water-based paint and black shadow to your mouth line and along the bone contouring. You will really start to see everything pop for a dramatic effect.
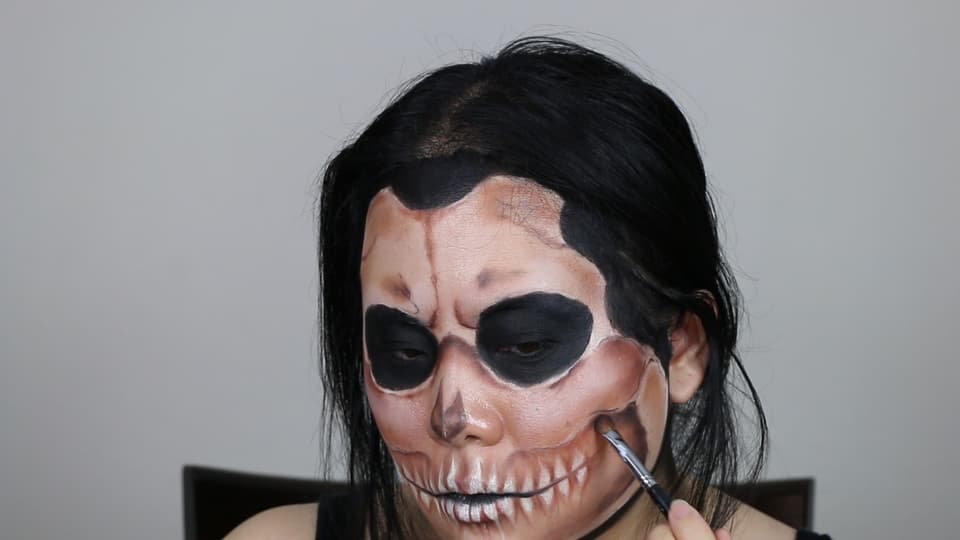
12. Go over any lines, cracks, or texture with the black-based water paint as well for any lost detail.
HOT TIP: I always start out light and build my way up in color because it’s always easier to add than it is to subtract.
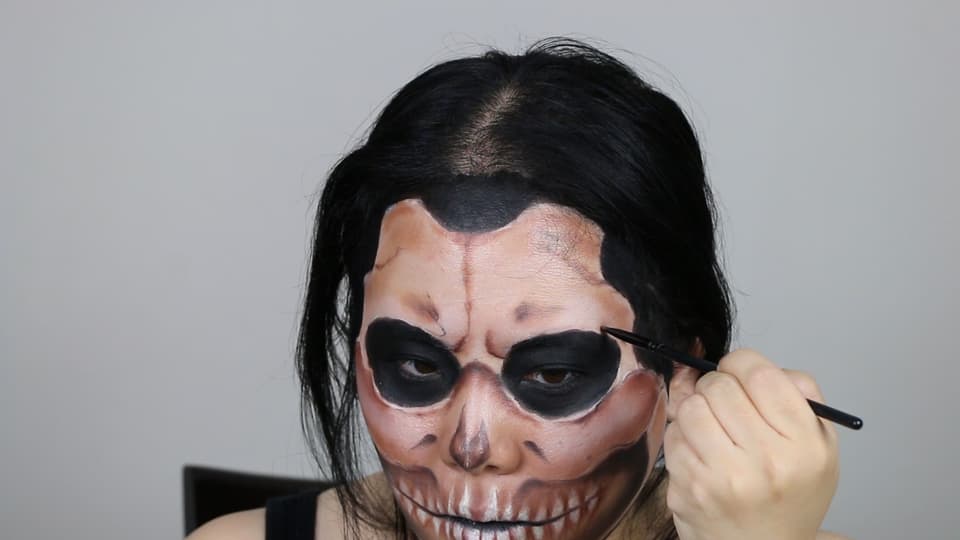
13. If your neck and hands will be showing, don’t forget to add in some vertebrae and skeleton hands as well. These final details will make everything cohesive.
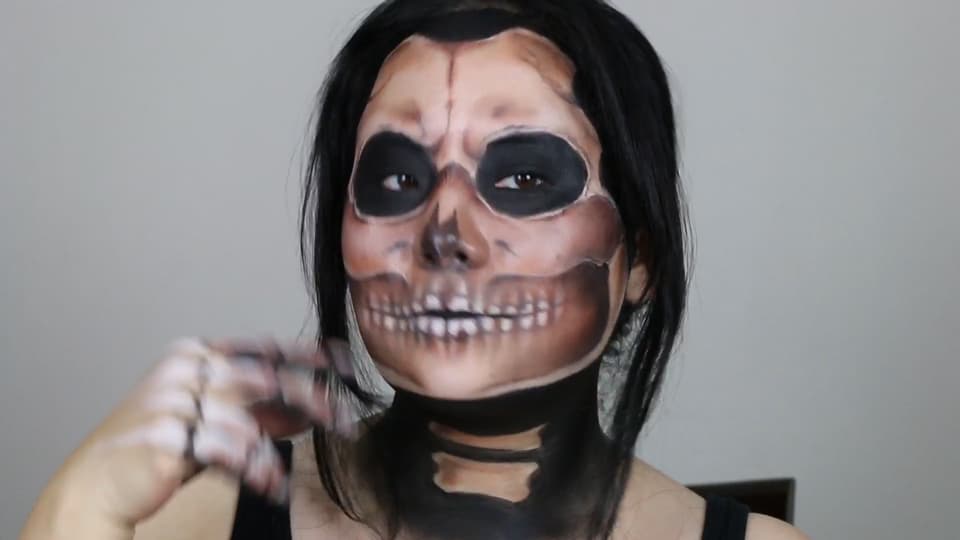
14. For the final elements, add some contacts, a wig, and a leather jacket to be on your way to dole out some punishment!
The Daily Bugle
Can’t-miss news and updates from across the Marvel Universe!
